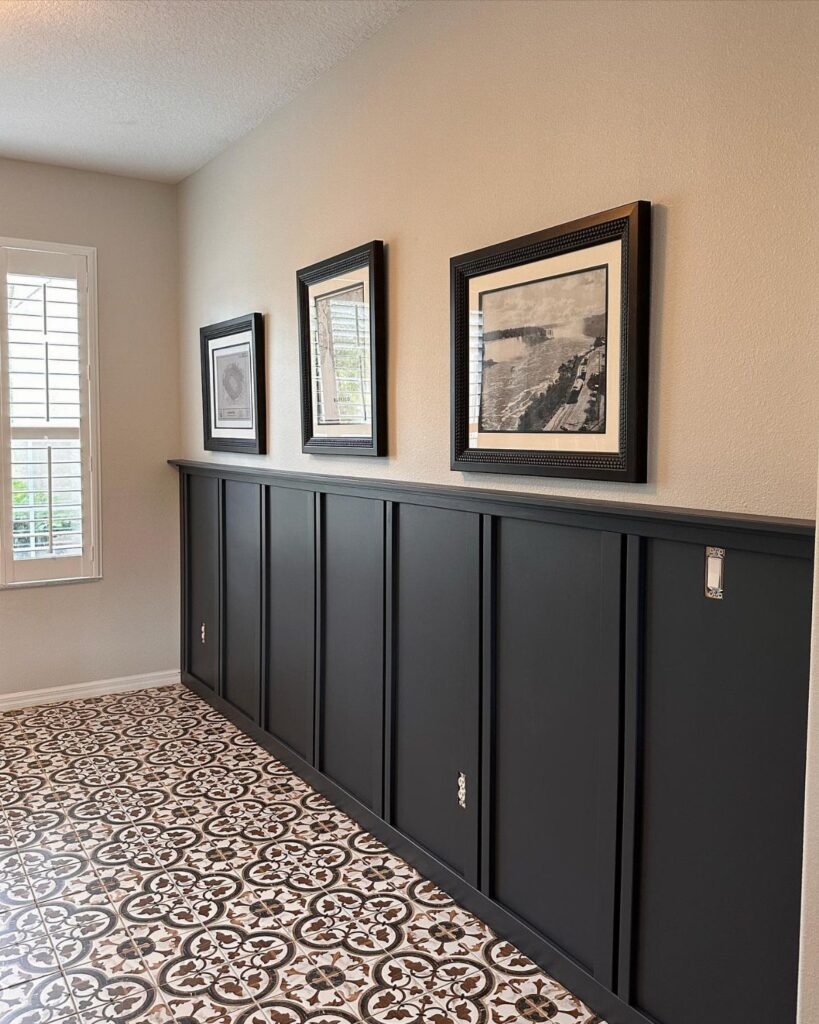
The ideas here run from an entryway coat rack panel to a full-wall grid and exterior siding, and the wall you have, plus how much of it you’re willing to cover, decides which one fits.
A board and batten accent wall or half-wall wainscoting keeps the lumber bill small, while a full-wall grid pattern asks for more cuts and more time.
Even the cheapest route works: primed MDF baseboards sold in a 10-pack for $43.99 became the battens on a wall about 157" long.
1. Vertical Boards with Battens
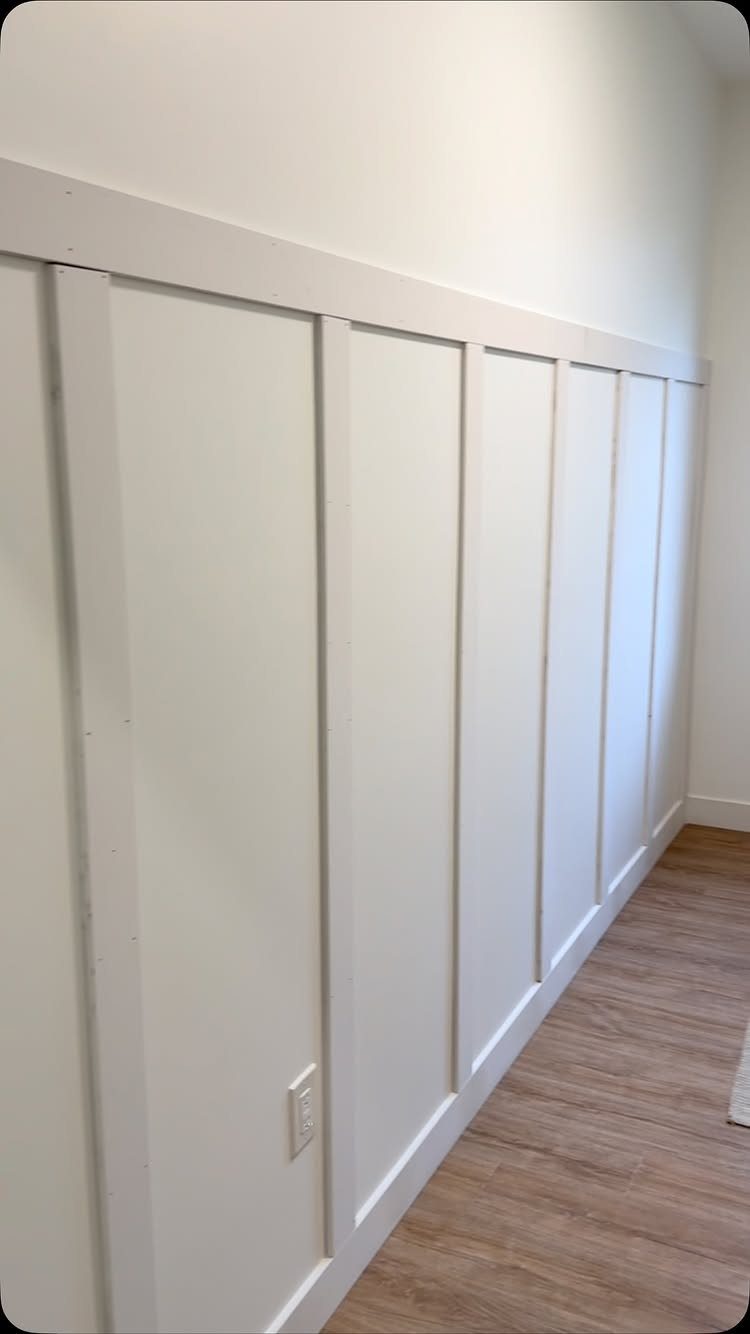
Primed MDF baseboards make a cheap batten. A 10-pack of boards at $43.99 covered a wall about 157" long, with the vertical boards spaced 19" apart and a single horizontal rail along the top.
That recipe is easy to copy. Measure your wall, divide it into equal gaps so the last board doesn’t land in a skinny leftover, and paint after filling the nail holes and caulking the seams.
Primed MDF saves a coat, though I’d still do 2 coats of finish for a clean white.
Check where outlets fall before you mark the layout. A batten right beside one is easy to cut around.
2. Spacing of Battens
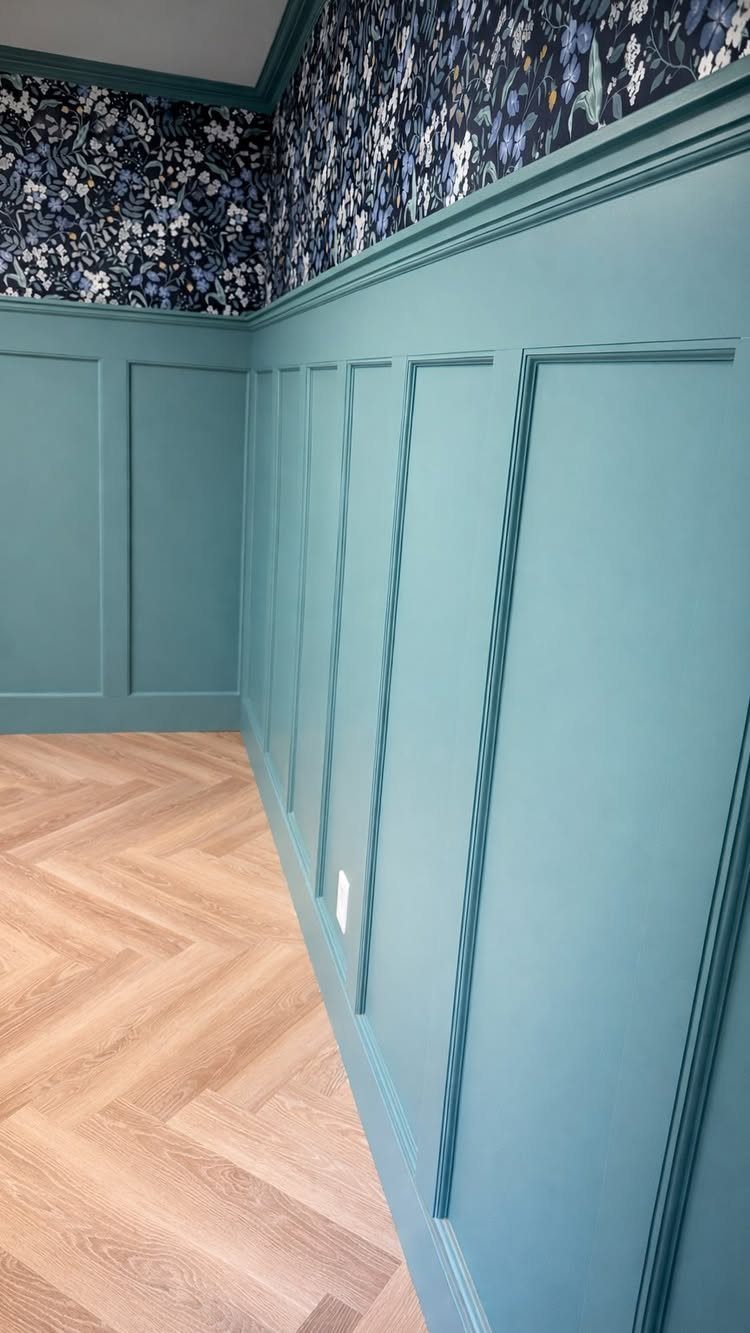
Batten spacing decides whether a wall feels calm or choppy. Wide, even gaps read quiet; tight ones get busy fast.
Here the wainscoting height matters as much as the gaps.
The teal stops where the floral wallpaper begins, so the battens and the paper each get their own zone. I’d mark the panel height with painter’s tape first and look at it from across the room before nailing anything.
Pick the spacing, then pick the height, then test both with tape. Moving tape costs nothing, and moving boards does.
3. Board and Batten Accent Wall
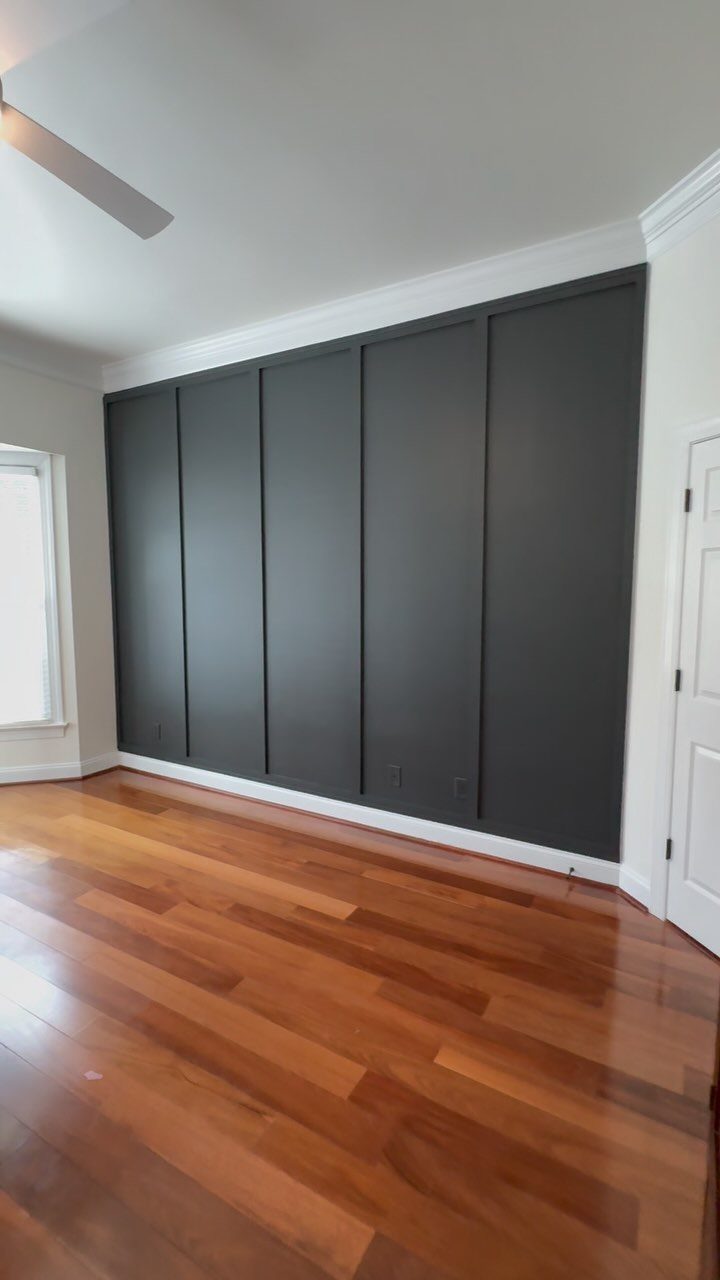
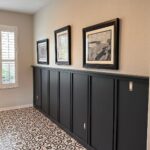
A single wall in dark gray board and batten gives a room a focal point without paneling every side. That keeps the lumber bill small, which suits a weekend budget.
Choose the wall your eye lands on first, usually behind a bed or sofa, or the one facing the door.
Paint the battens and the boards between them the same color so the shadows do the work. The white trim and door stay crisp against the dark gray, so I’d keep trim white rather than matching it.
Dark paint shows caulk gaps and sloppy corners, so take extra time on those.
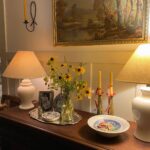
Formal dining rooms are back and better than ever. Board and batten wall paneling is great way to quickly elevate your dining room and add drama to the space.
4. Half-Wall Wainscoting
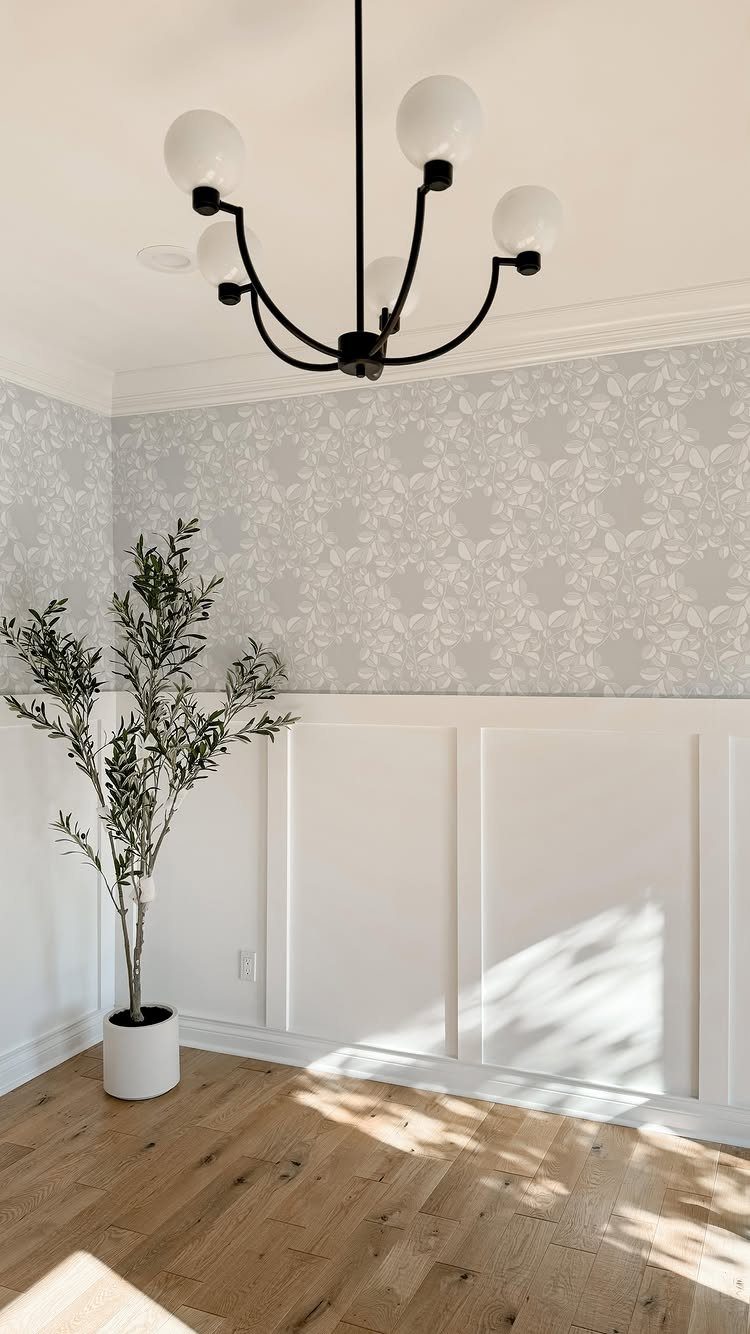
Half-wall board and batten covers only the lower part of the wall and leaves the top for wallpaper or painted drywall. I like that split because the paneling handles the bottom and a pattern gets the rest.
Pick a paper with a soft pattern, as this light gray floral does, so the white paneling stays the calmer partner. Finish the top with a rail wide enough to catch the paper’s lower edge neatly.
You buy fewer boards than for a full wall, and a single roll or two of paper can cover the upper section.
5. Full-Wall Grid Pattern
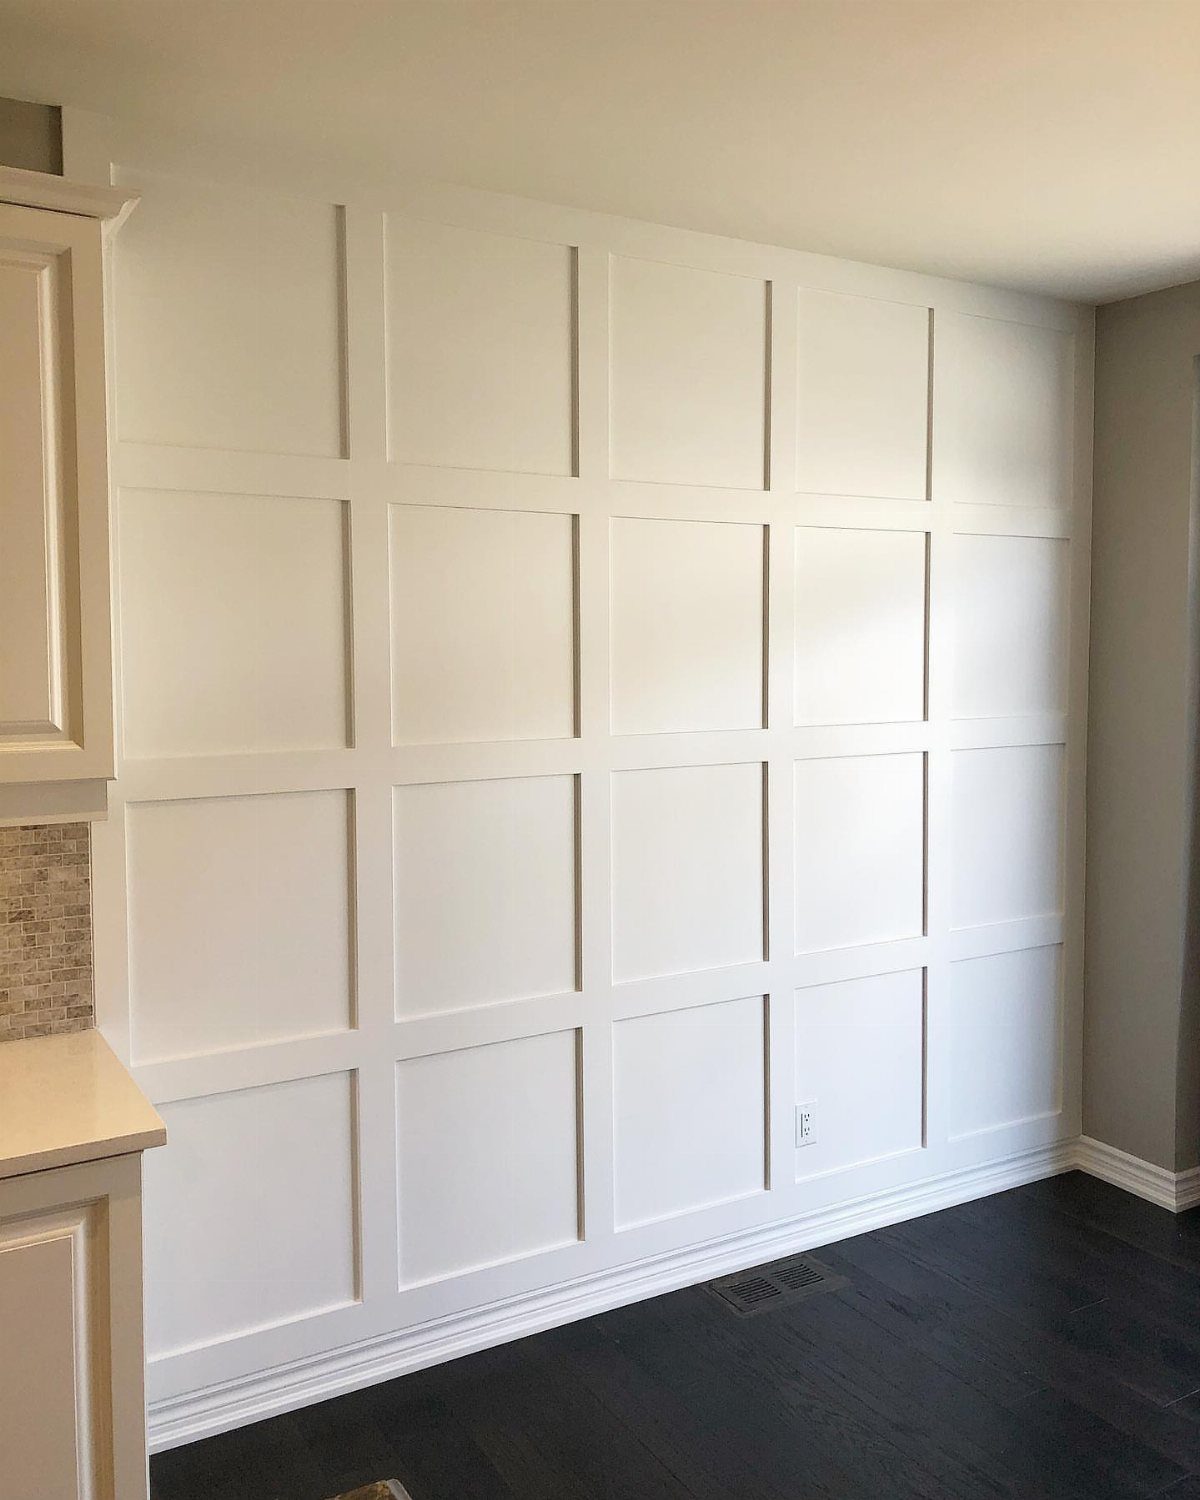
A full-height grid turns a plain wall into a wall of squares, with battens running both vertically and horizontally from baseboard to ceiling line. It takes more cuts than straight verticals, so I’d budget extra time.
Mark the squares on the wall with a level and tape before gluing anything.
Every horizontal needs to line up across the whole wall, or the grid looks off at a glance. Painting the whole wall one white, as here, hides small seams and keeps the pattern graphic.
6. Entryway Coat Rack Panel
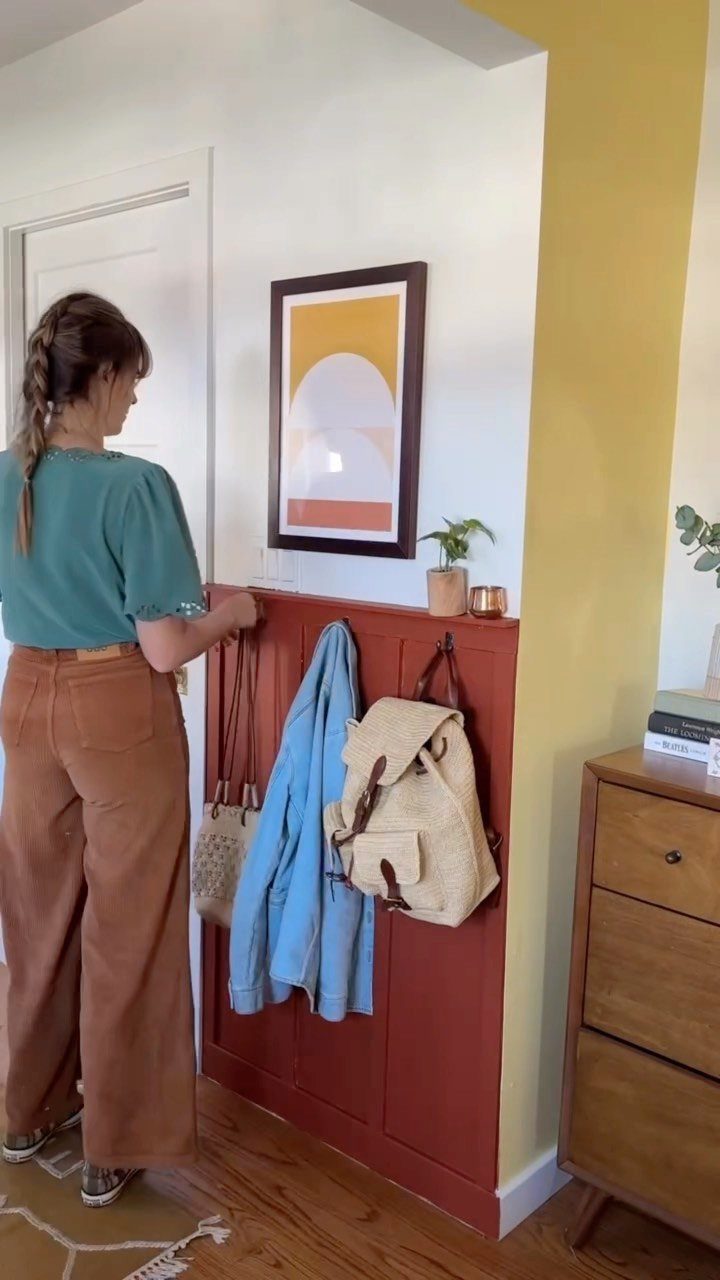
Hooks mounted on a board and batten panel give an entryway a coat rack that is part of the wall. Red is a bold choice, and I like it because a small section can carry a strong color.
Fasten the hooks through the backer board, not just a batten, so they hold a heavy jacket or a loaded bag. Set the hook height for the people using it, and space the hooks so coats don’t overlap.
A panel this size is a small project, which makes it a good first try at the technique.
7. Large Rectangular Wall Panels
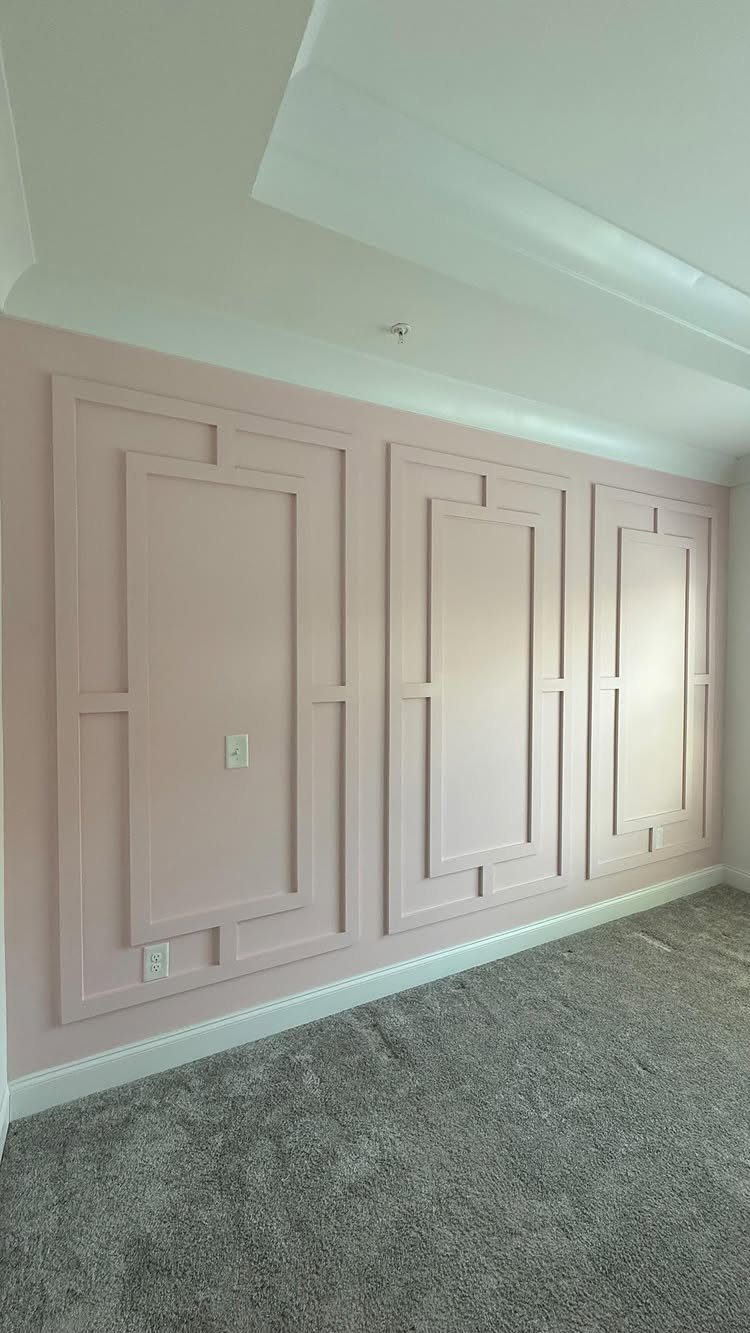
3 tall rectangles framed in molding give a wall structure without the busy rhythm of closely spaced battens. Fewer, larger panels suit a bedroom or nursery, where the wall should feel calm.
Space the frames evenly and keep the gap between them narrower than the panels themselves, so they read as a set. Tape the outlines on the wall first and check them from the doorway.
Light pink reads soft, and painting the molding and the wall inside it the same color lets the shadow lines draw the frames. Skip the contrasting trim here.
8. Wainscoting with Display Ledge
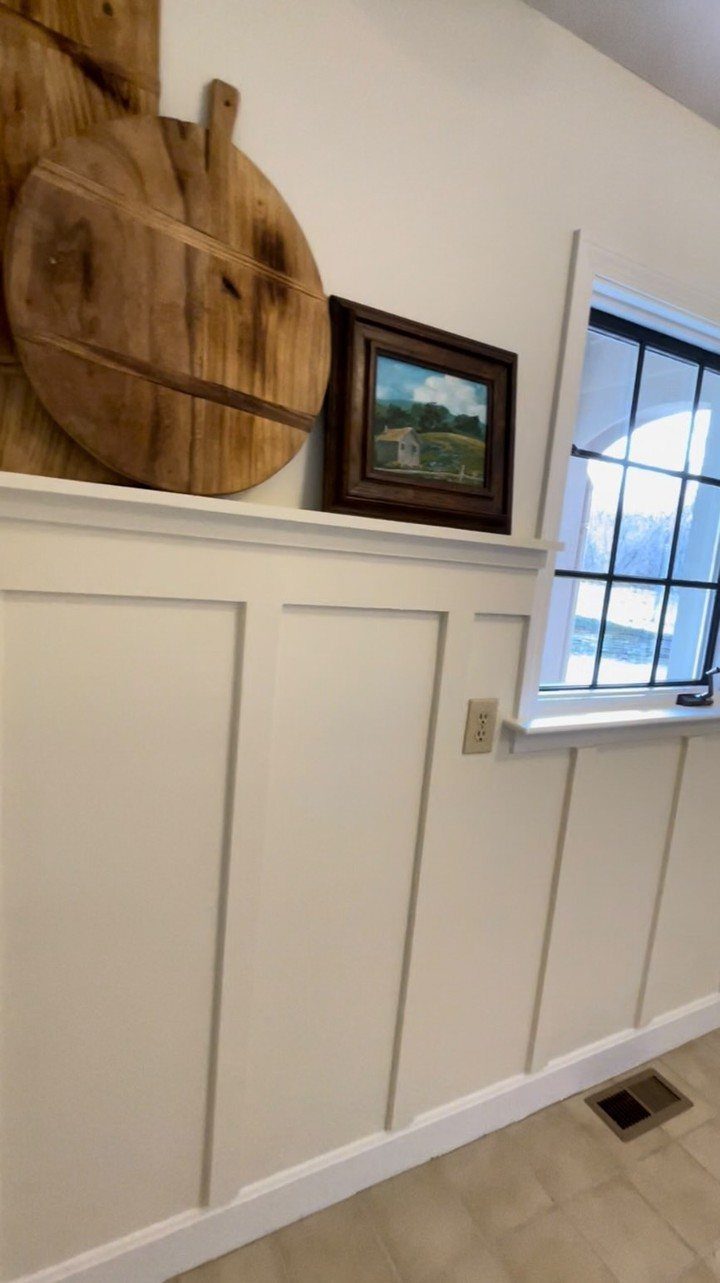
A ledge across the top of a board and batten half-wall turns the paneling into a shelf you can use.
Framed art, cutting boards and small brackets all sit comfortably on it, and a window beside it makes a nice spot for a kitchen or entry.
Pick a cap board deep enough to hold what you plan to display, and fasten it into the wall framing or a solid backer so it carries the weight.
Caulk the seam where the ledge meets the wall; that line is easy to see.
I’d keep the display to a few pieces. Lean the art, don’t hang it, and you can swap things in seconds.
9. Exterior Board and Batten Siding
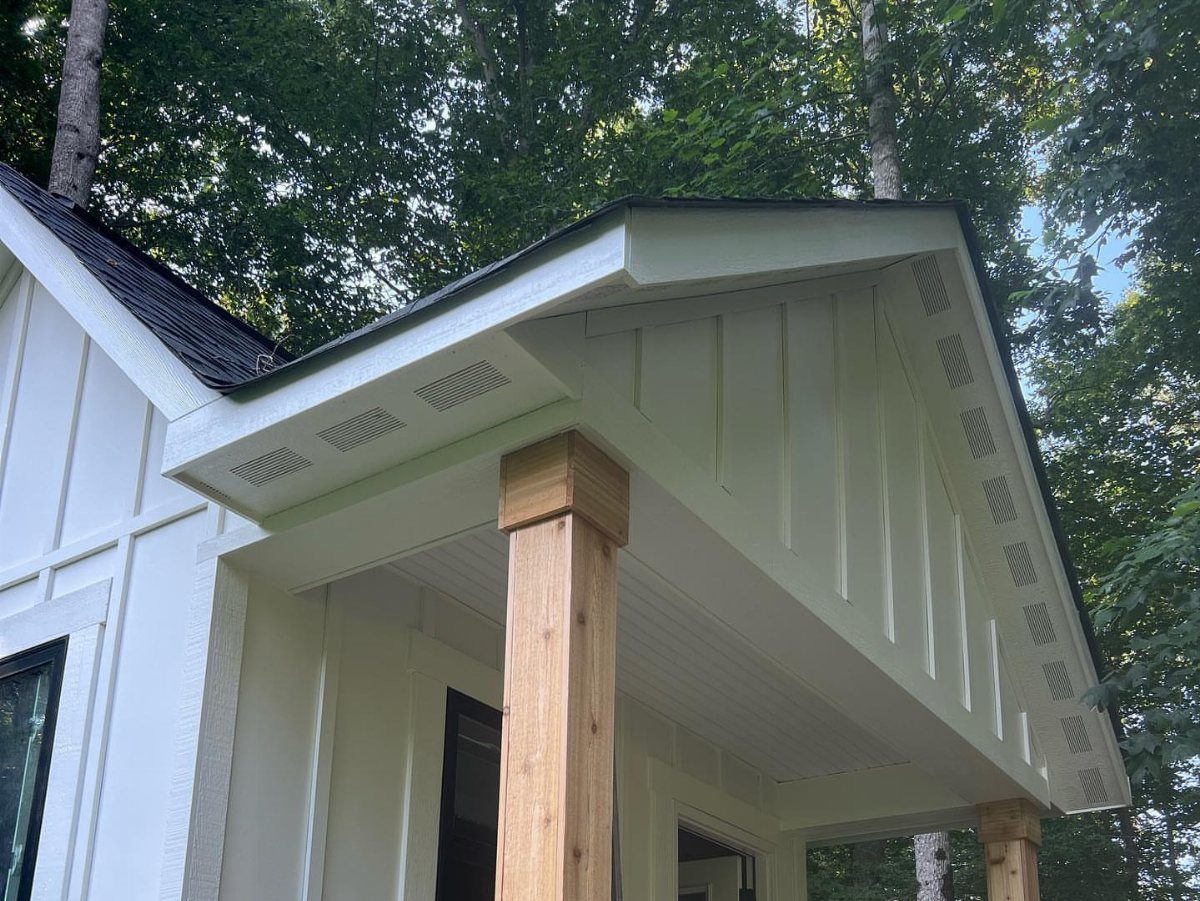
Board and batten siding is the same idea as the interior wall, just built for weather. On a porch or a front facade, the vertical lines add height, and white siding pairs well with a plain wooden post.
A porch wall is a manageable place to start because it is small and sheltered by the roof. Use exterior-rated boards and caulk, and finish with exterior paint, since indoor MDF and interior caulk will not hold up outside.
The battens need to land over every seam where boards meet, blocking water from reaching the gap. Get that right and the finish you pick matters far less.
Tools Needed for Installation
A miter saw, a brad nailer, a level, a stud finder and a tape measure cover nearly the whole job. Add safety glasses and hearing protection, since you’ll be cutting a lot of boards.
A laser level is worth borrowing if you can, because it throws one line across the whole wall. Get a partner to hold the other end of boards and you’ll finish much faster.
A magnetic stud finder picks up the nail heads in the framing, so it finds studs but says nothing about pipes or wiring behind the drywall.
Treat that as a limit, and keep nails away from spots where wiring could run, such as directly above or below an outlet.
Every cut is a straight edge, so this suits a first-timer.
One wall can take about half a day; more than one usually becomes a weekend. Caulking and touch-up paint are the slow part.
Preparation Steps
Start by clearing the wall: outlet covers, frames and anything hanging. Remove existing baseboards too if the boards will run to the floor, then wipe off dust and debris so the adhesive and paint have a clean surface.
Fill every nail hole and dent with spackle, give it time to dry, then sand each patch flush with the wall.
Textured walls give you 3 choices:
- For the flattest, sharpest base, skin the wall with hardboard or another smooth panel before any boards go up.
- Skim coat the wall for the smoothest look. It takes more labor.
- Leave the texture and accept a more rustic finish.
I’d pick the panels for a weekend job and the skim coat only if you want a polished result. Rush the prep and you pay for it later: crooked boards, glue that never grips, and paint that looks blotchy.
Common Mistakes to Avoid
Spacing errors are easier to avoid if you install the boards edge to edge first. Caulk and paint also cover any gaps that open up over time, and the battens would otherwise sink into the seams between boards.
Finishing is where people cut corners.
It is slow, fussy work, and I still wouldn’t skip it. The caulk and filler make the paint last longer and the surface look even and smooth.
Hold a level to every board as you hang it, before the adhesive or nails lock it in. One crooked piece throws off everything after it.
Frequently Asked Questions
What kind of wood is used for board and batten walls?
Primed MDF is a cheap, easy choice for an indoor wall, and solid wood such as pre-primed pine or lattice strips also works.
MDF paints up smoother than most solid wood and hides drywall flaws well, but I would skip it in bathrooms and kitchens, where steam and splashes make the edges swell and warp.
For outdoor siding, use exterior-rated boards, and cedar or pressure-treated wood holds up to weather.
What are the disadvantages of board and batten?
Solid wood boards shrink as they dry, so I make the battens wide enough, usually 1.5–2.5 inches, to cover any gap that opens at a seam.
Nail placement matters too, since shrinking wood can split where it was nailed. Caulking, filling and painting are slow, fussy work, and a textured wall needs extra prep or the finish looks rough.
How much does it cost to board and batten a wall?
Cost follows the wall size and the material you pick, and a single accent wall can stay well under a few hundred dollars. One wall was built from a 10-pack of primed MDF baseboards for $43.99, covering about 157" of wall.
Other projects have run from about $50 to $650, with bigger rooms and extra molding pushing the cost up. Stopping partway up the wall keeps the bill lower.
How do you do a simple board and batten wall?
Before you cut anything, work out the spacing so the last gap matches the others, then snap level lines or lay painter’s tape to see the pattern on the wall.
Fasten the boards with a brad nailer, using construction adhesive if you like, and check each one with a level as it goes up.
Fill the nail holes, caulk the seams and paint, doing 2 coats for a clean white. One wall takes about half a day.